For Flex container
Flex container is the parent of flex items / flex childs. To enable Flexbox feature, we should put display: flex; to the flex container. However the flex container supports other awesome stuffs, that are only allowed in the flex container. So we don’t need to add flex properties to their child items. Let’s discuss about the main flex properties which work only in the flex container.
1. flex-direction
The flex-direction property specifies how these items are placed in the flex container, by setting the direction of the container’s main axis. This determines the direction that the flex items are laid out in.
.flex-container {
  flex-direction: row | row-reverse | column | column-reverse ;
}
The result should be like this
2. flex-wrap
The CSS flex-wrap property specifies whether flex items are forced into a single line or can be wrapped onto multiple lines. If wrapping is allowed, this property also enables you to control the direction in which lines are stacked.
.flex-container {
  flex-wrap: nowrap | wrap | wrap-reverse;
}
The result should be like this
3. align-items
The CSS align-items property, aligns flex items of the current flex line in the same way as justify-content but this in the perpendicular direction (align flex items in the cross-axis).
.flex-container {
  align-items: flex-start | flex-end | center | baseline | stretch;
}
The result should be like this
4. justify-content
The CSS justify-content property defines how the browser distributes space between and around flex items along the main-axis of their container.
.flex-container {
 justify-content: flex-start | flex-end | space-between | center | space-around;
}
The result should be like this
5. align-content
The CSS align-content property coordinates a flex container’s lines within the flex container when there is extra space on the cross-axis. Align-content property affects only those flex items that has multiple lines. So, it won’t work when the flex items are in single line. To ensure that the items are spread across multiple lines, we should add the flex-wrap property to wrap the flex items in the container.
.flex-container {
  align-content: flex-start | flex-end | center | space-between | space-around | stretch;
}
The result should be like this
For Flex items
Flex items are the items of a flex container. They are positioned along the main axis and cross axis. The main axis is horizontal by default. So the items flow into a row that can flip the main axis by setting flex-direction to column and it’s set to row by default in adding flex container.
1. align-self
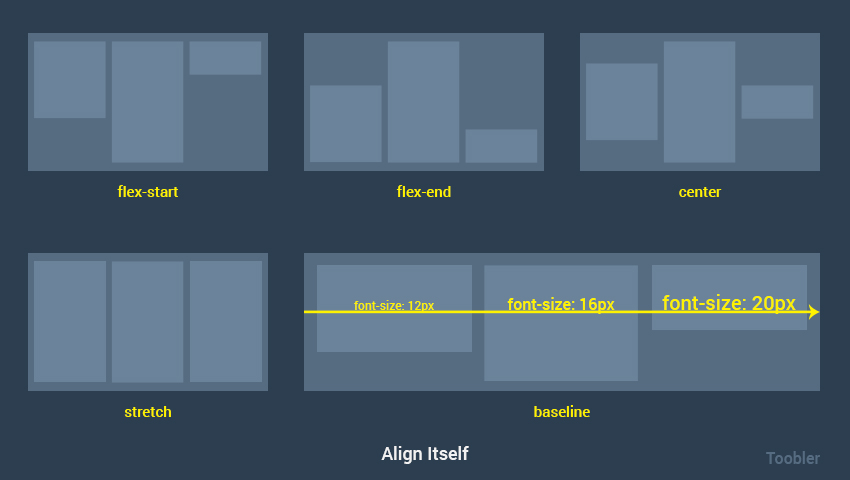
The align-self CSS property aligns flex items of the current flex line overriding the align-items value. If any of the flex item’s cross-axis margin is set to auto, then align-self is ignored.
.child-item {
  align-self: auto | flex-start | flex-end | center | baseline | stretch;
}
The result should be like this
2. flex-grow
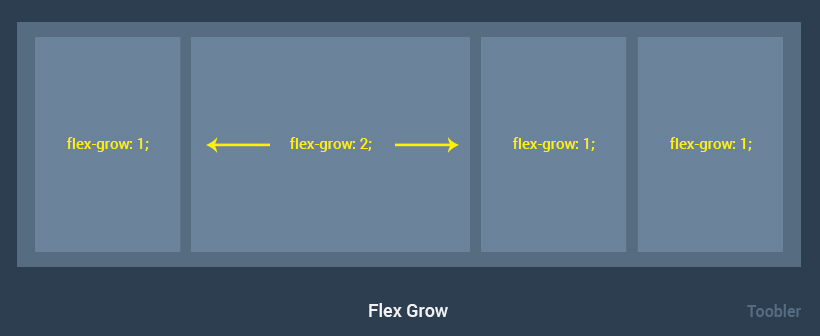
A flex-grow value is a number that determines how much the flex item will grow, relative to the rest of the flex items in the flex container, when positive free space is distributed. The initial value is zero, and negative numbers are invalid.
.child-item {
  flex-grow: number;
}
The result should be like this
3. flex-shrink
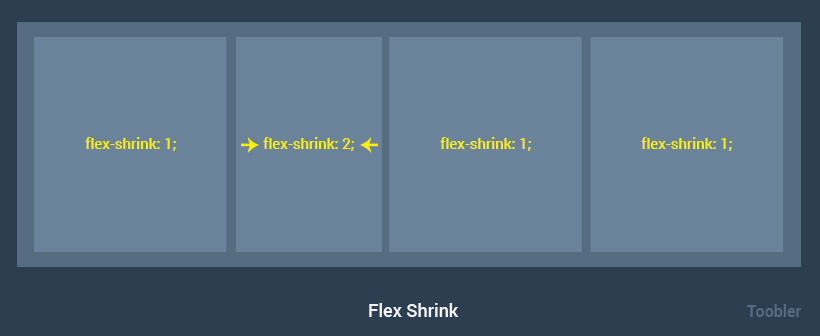
The flex-shrink CSS property specifies the flex shrink factor of a flex item. It determines how much a flex item can grow relative to the rest of the flex items in the flex container when the negative free space is distributed.
By default, all flex items can be shrunk, but if we set it to 0 (don’t shrink) they will maintain the original size. Negative numbers are invalid.
.child-item {
  flex-shrink: number;
}
The result should be like this
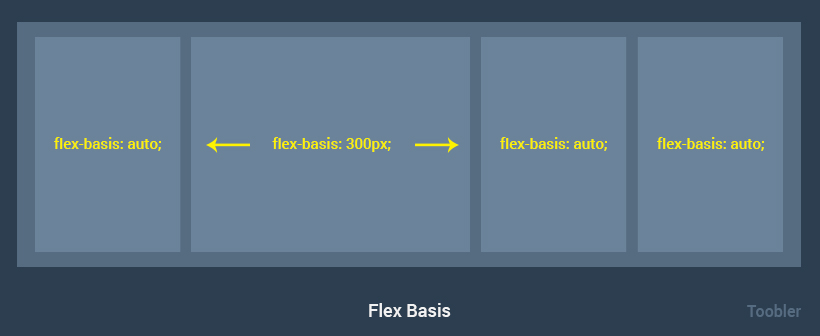
4. flex-basisThis property takes the same values as the width and height properties, and specifies the initial main size of the flex item, before free space is distributed according to the flex factors.
.child-item {
  flex-basis: auto | width;
}
The result should be like this
5. Order
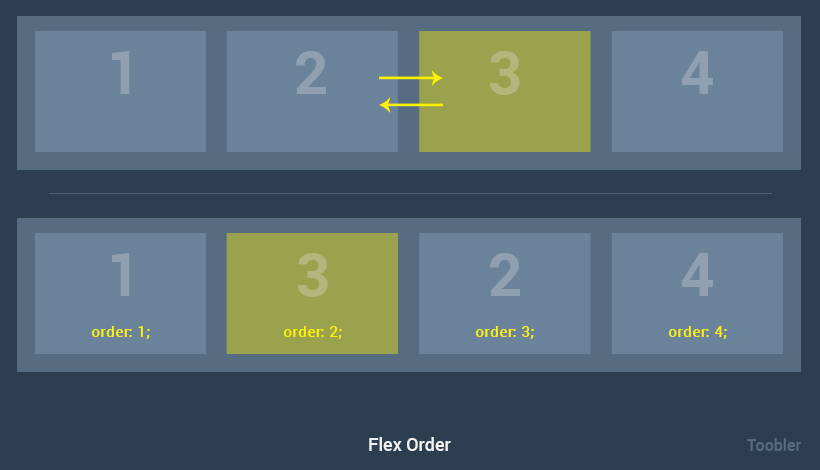
Flex items are aligned in the same order as we declare them in the source code. But the flex order allows changes to be made to this order based on our requirements. The order property controls the order in which the flex items appear within their flex container, by assigning them to ordinal groups.
Note that the order of the flex items in the flex container will not change in the source code, it will affect only the output result once the browser is rendered.
.child-item {
  order: number;
}
The result should be like this
6. flex
The flex property is the shorthand for the flex-grow, flex-shrink, and flex-basis properties.
.child-item {
  flex: none | auto | [ <flex-grow> <flex-shrink>? || <flex-basis> ];
}
Browser support
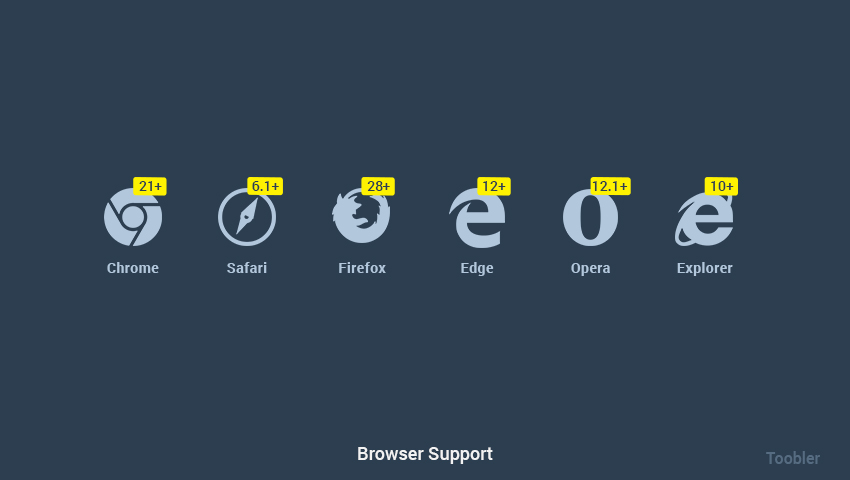
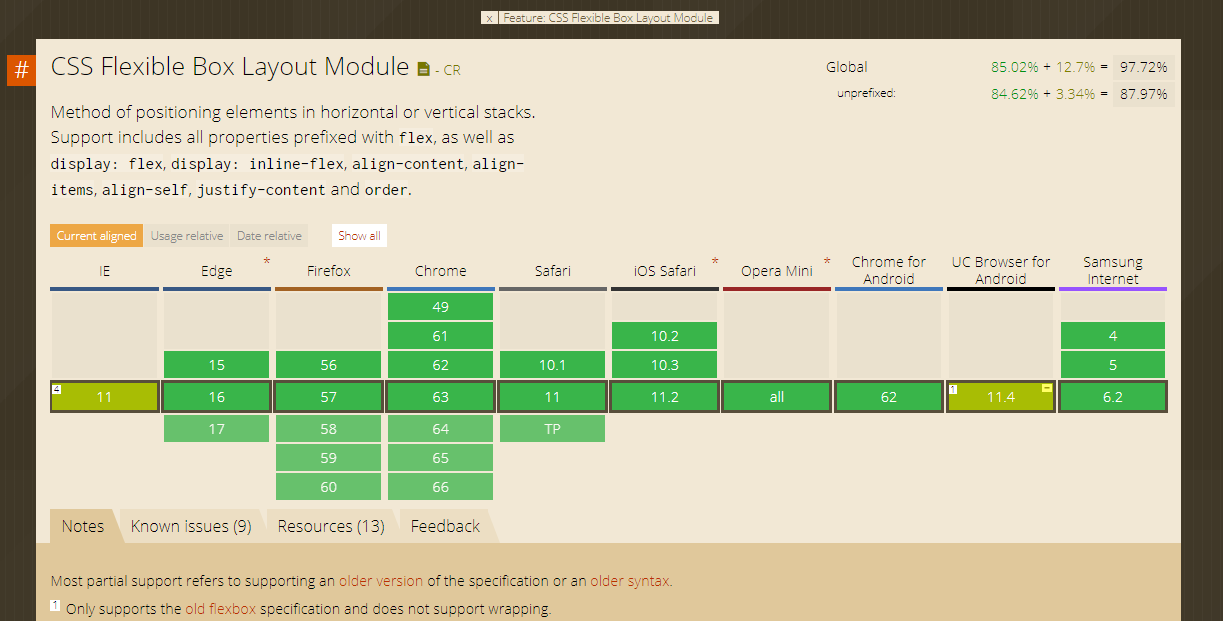
This is a tough one to answer. Flexbox layout is completely supported by popular browsers like Chrome, Firefox, Safari, etc which are always up-to-date and the older versions don’t support Flexbox. Can I use allows us to refer to the current information they have posted on their website.
Check out the latest screenshot from can I use, and figure out the spectacular browser support.
Summing-up
Flexbox is an extremely powerful layout model in CSS3, as it helps web developers to achieve a more condensed layout in small bits of code, in the best timely manner. Even Bootstrap included flexbox in their latest version of Bootstrap 4 which is powered by their grid system.
In the absence of flexbox, we may be using traditional CSS properties like Floats, Display, Relative units (% or em) for sizing, Media queries, and JavaScript. But two of the major drawbacks of using flexbox are the performance issues and browser compatibility, it is not supported by most of the browsers and it has been reported that the use of flexbox increases the page loading time for larger projects. Let’s hope that these issues will be solved in the near future. We are also able to write less code, thus making it more versatile. It is of tremendous value for responsive layouts as it doesn’t require traditional coding either.
Furthermore, we have a new CSS3 feature, the CSS GRID, the native CSS grid feature which is slightly the same as the flexbox. But as both flexbox and CSS grid have varied applications, they should be used together, rather than as alternatives to one another. Let’s catch up on this in another article.
Hope this will enlighten your knowledge of Flexbox. Want to get in touch with us? please Contact us.


/f/122804/1800x676/92f2b7c845/css-flex-box-2-1.png)


/f/122804/1800x676/5145e6b663/html5defcon-1.png)
/f/122804/1800x676/5234b1156f/css-features-1.png)
/f/122804/1800x676/ae56e74be8/css-variable-1.png)